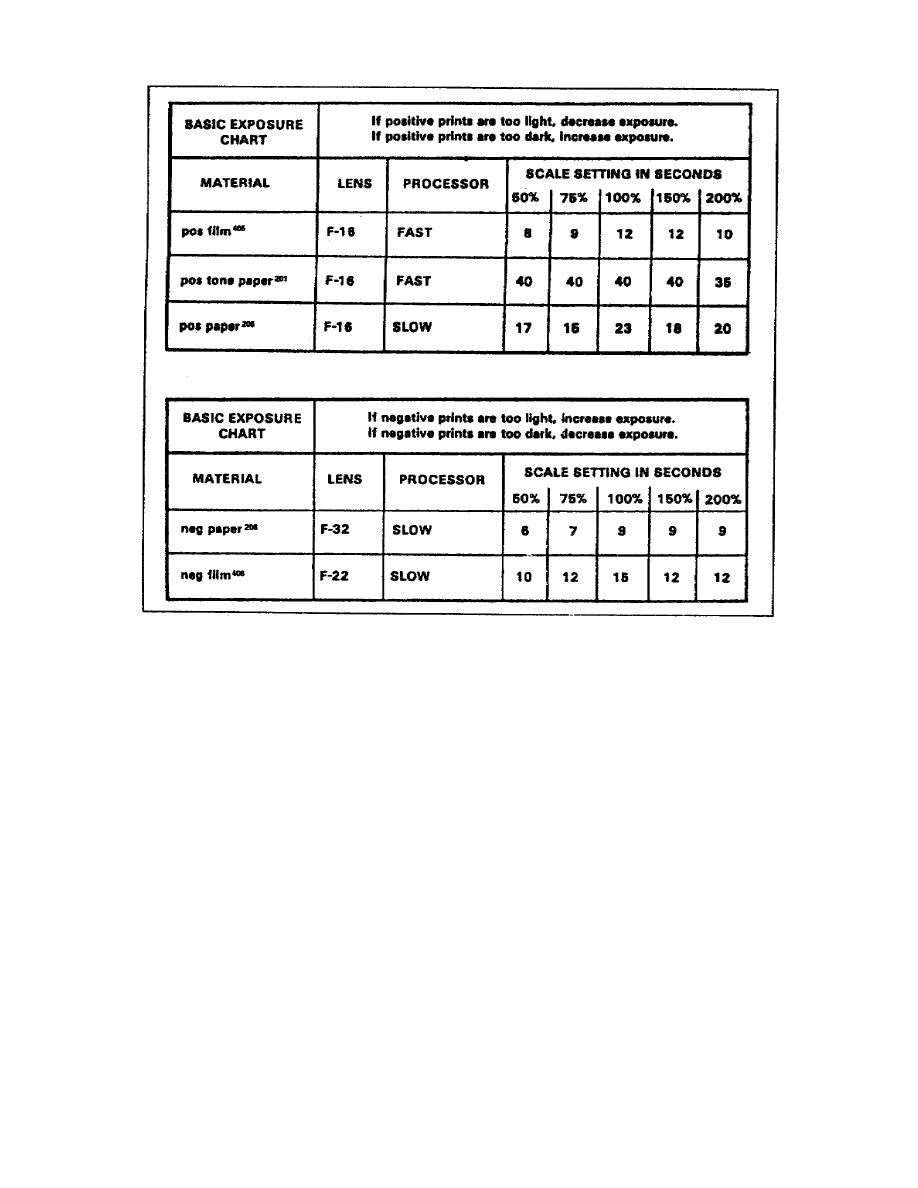
Figure 210. Sample exposure charts
When you have sized the selected material and cardboard backup, you can
slide the photo material, emulsion side down, with the cardboard backup
on top, between the clear glass and the folded platen (figure 211). It
is helpful to remember that manufacturers package paper and film
emulsion side down in the magazines. When you have aligned the photo
material on the positioning marks, fold the split platen down over the
photo material and cardboard backup.
(6) Exposing the print material. You can now press the exposure
button on the control panel and start the exposure process. When the
camera has completed the process, the lights go off, and the timer
resets to the original setting.
(a) You then lift the split platen slightly and slide the
exposed print forward from under the glass. Do not touch the emulsion
on the print material. This could result in your fingerprints on the
developed print. Next feed the exposed print material squarely into the
process feed chute (figure 211). When the processor takes the edge of
the print, release
2-17
SS0530


 Previous Page
