(2) Mounting the overlays. As you learned in lesson 1, a
viewgraph (in this case the base) film mounts to the back of the frame.
Each overlay mounts on the front of the frame. When you must present
the elements of the overlay in a specific order, mount each overlay on
the same side of the frame. This also allows you to position them while
on the overhead projector. If you do not have to present the overlays
in a specific order, mount them on alternating sides of the frame. This
way you can still position them while on the overhead projector. Then
trim the overlays so they all fall into place easily.
You also can attach small tabs of masking tape or adhesiveback labels
on the loose upper corner of each overlay. You can grasp the tabs
easily when placing the overlays in place over the base element.
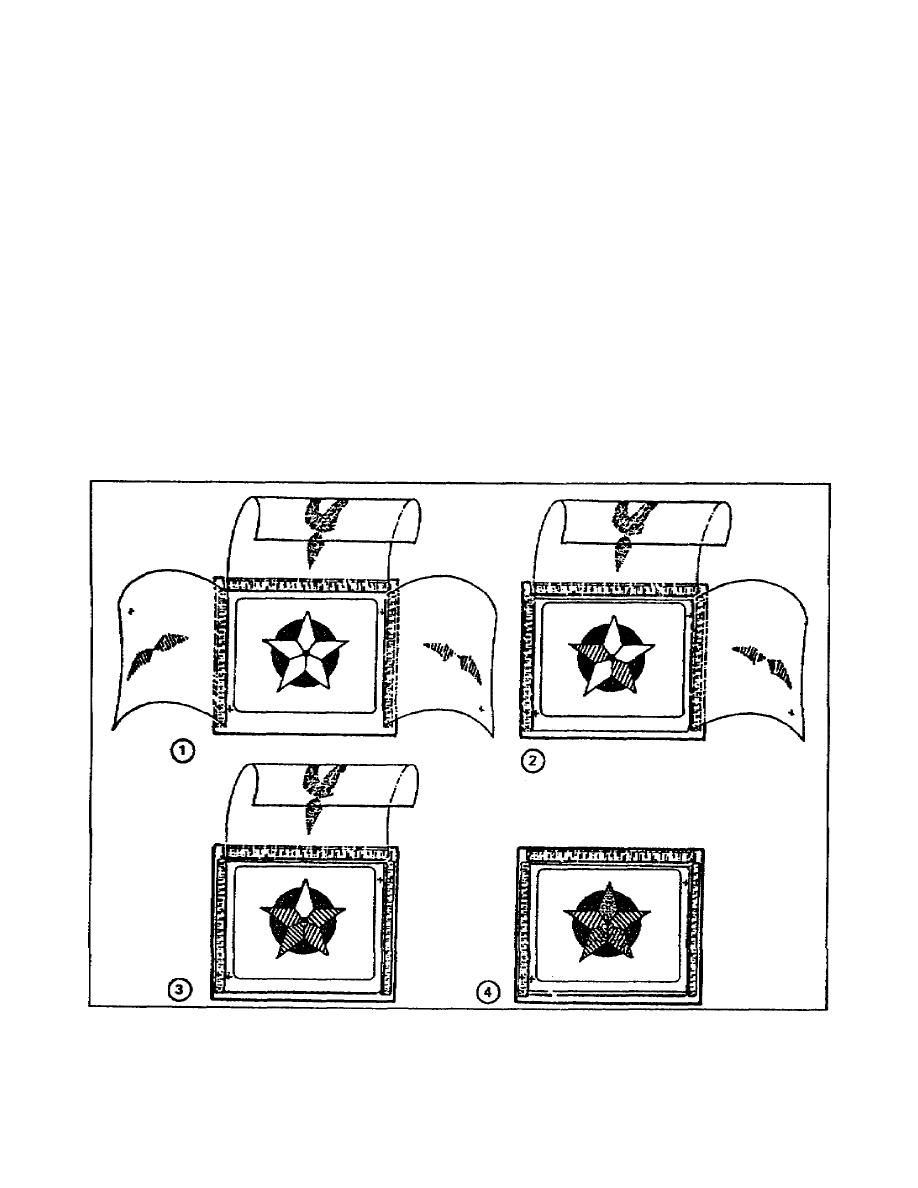
(3) Using overlays. Figure 228 shows the use of graphic
overlays. Since the overlays mount on each side of the frame, that
indicates you do not have to present them in a prescribed order. In
this figure, the base element is the star with no shading in any points.
As you position each overlay, you add shading to each point.
Figure 228. Graphic overlays
2-49
SS0530


 Previous Page
