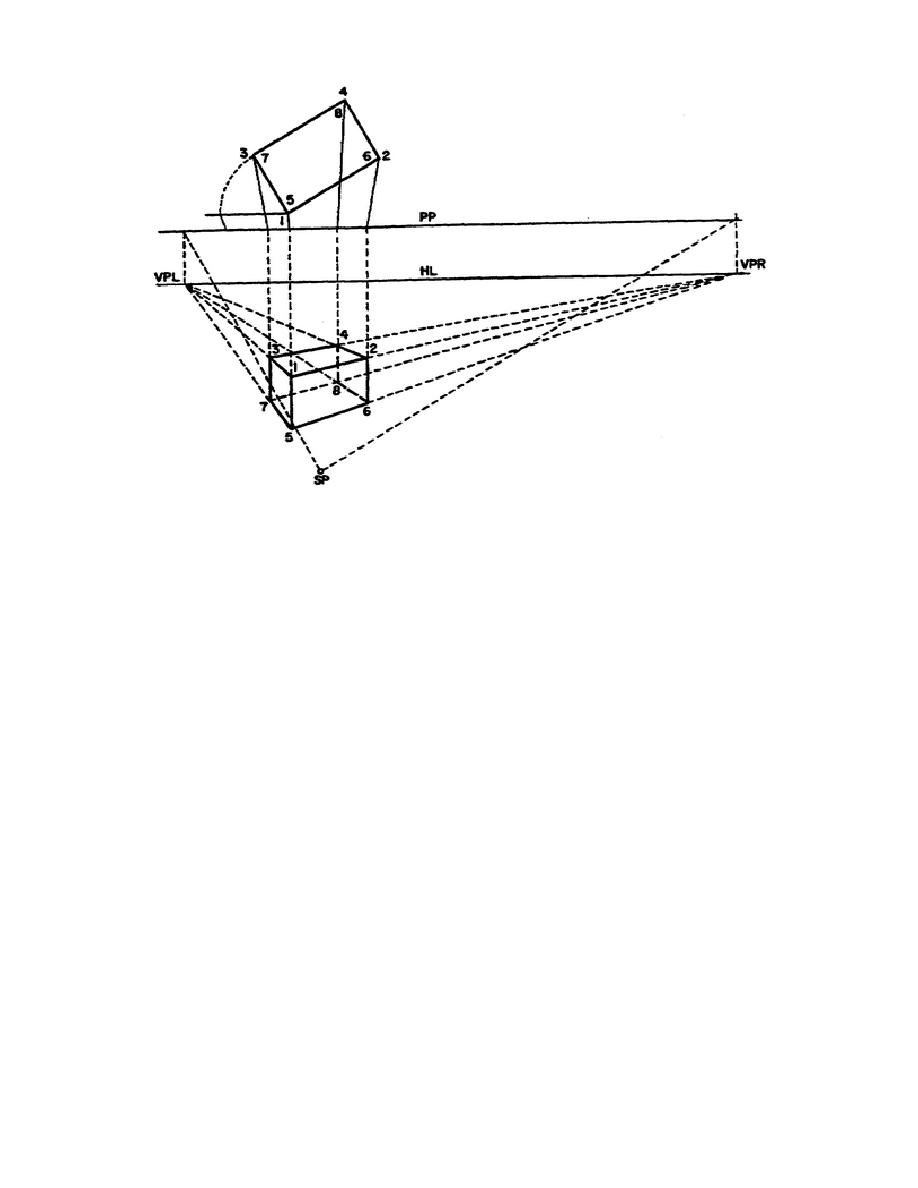
Figure 2-4. Two-point perspective drawing made
without using an elevation of the object
11. This method is usually used when architectural drawings are made in two-
point perspective.
However, two-point perspective may be drawn from the
plan view of the object alone, without the elevation. When this is done,
the vanishing points are first projected on the picture plane and then
located on the horizon line (fig 2-3). In order to do this, first locate
the station point for the constructed plan view.
Second, draw lines from
the station point to the picture plane that are parallel to the lines in the
plan view, as shown by lines 1-2, and 1-3 in Figure 2-3.
The points at
which the lines intersect the picture plane are then projected vertically to
the horizon line to locate the VPL and VPR.
12. In Figure 2-4 lines are drawn converging toward the station point from
the corners of the block in the plan view.
From the points where these
lines pierce the picture plane, verticals are dropped to give the apparent
width of the block in the perspective view. Since an elevation is not used,
the various heights cannot be found directly.
However, the bottom of the
block may be located by drawing lines to the vanishing points from the point
i.e., (5) selected as the near corner (fig 2-4).
13. Now if the perspective height of any one vertical line can be
determined, the height of the other verticals can be found automatically.
This is easy to do when one edge of the object rests against the picture
plane.
This edge will then appear in its true height in the perspective
view.
If you have the dimension for this height in the orthographic
projection, you can transfer that dimension directly to the perspective
view. Lines drawn to the vanishing
15


 Previous Page
