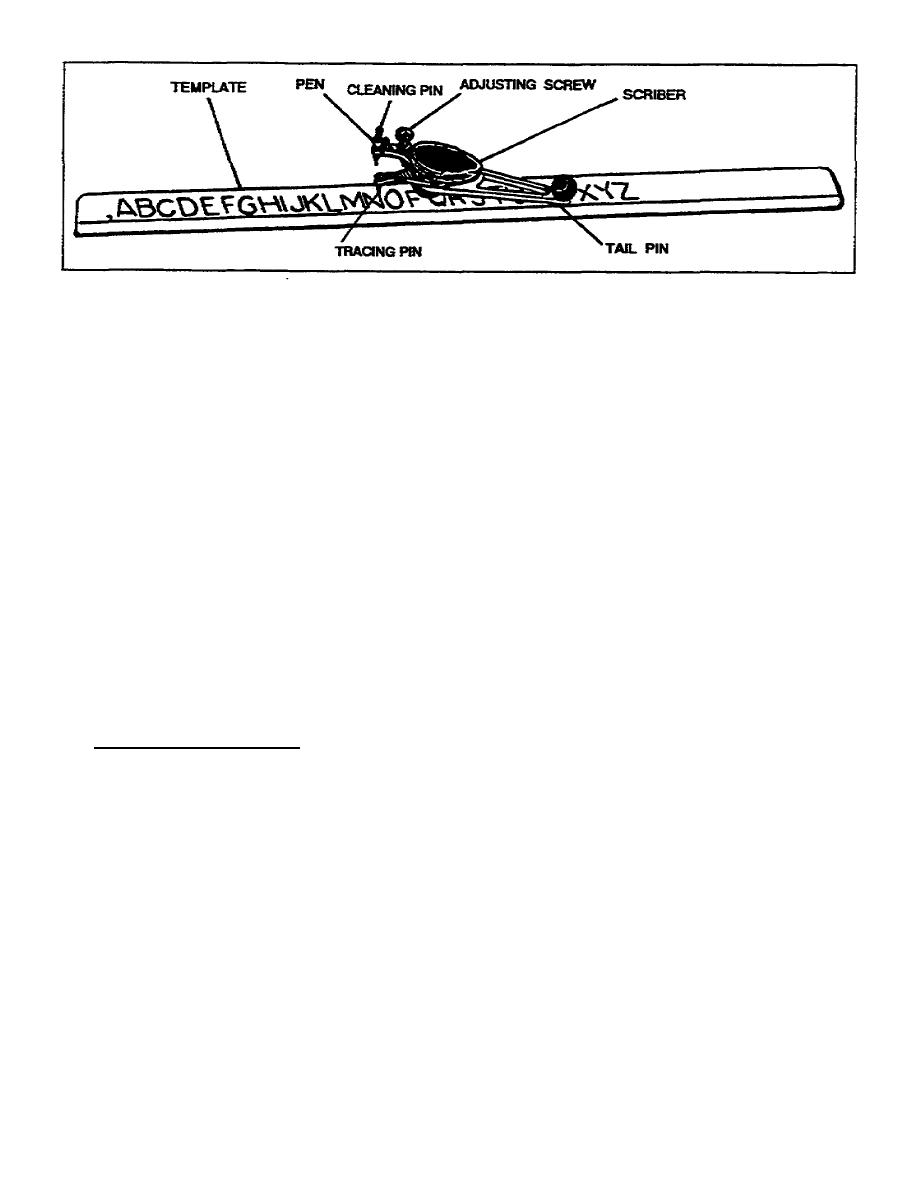
Figure 3-2.
Leroy pen and template
a. Three-Legged, Adjustable Scriber. One leg holds the pen or pencil,
the other two legs are tracer points. One of the tracer points rides in
the straight groove etched across the bottom of the template. This point
also serves as the swivel point for the scriber. The other tracer point
traces the letters etched in the template. As you rotate the scriber by
following the contours of the letter, the leg holding the pen or pencil
replicates the letter on the work surface.
b. Pens and Pen Holders. There is an adjusting screw mounted on the
same leg of the scriber containing the pen and holder.
The purpose of
this adjusting screw is to position the pen or pencil correctly relational
to the work surface.
Adjust this screw so that the pen or pencil makes
light, but constant contact with the work. Use a piece of scrap paper and
adjust the pen until you achieve the correct contact.
The pens are
vertical and held in place by a clamping screw. Tighten this screw until
the pen does not move. Do not overtighten this screw or you will damage
the pen or pencil.
To use the Leroy set correctly, you must select the
proper pen for the template you use. Use figure 3-3 to select the correct
pen.
3.
Using the Leroy Set.
a. Introduction.
The adjusting screw controls how much pressure or
contact the pen point makes on the drawing surface. You set the adjusting
screw so the tip of the cleaning pin just touches the drawing surface. If
the pen point exerts too much pressure on the drawing surface, the pen may
cut grooves on the drawing surface and too much ink flows from the pen.
When too much ink flows from the pen's reservoir, the letters have a
tendency to run and smear.
The Leroy set also has the capability to
letter italics. To letter italics, you adjust the slant of the scriber's
tracer arm to 22 1/2".
3-3
SS0525


 Previous Page
