right. To draw a curve of uniform width, roll the brush with your fingers
in the direction of the stroke.
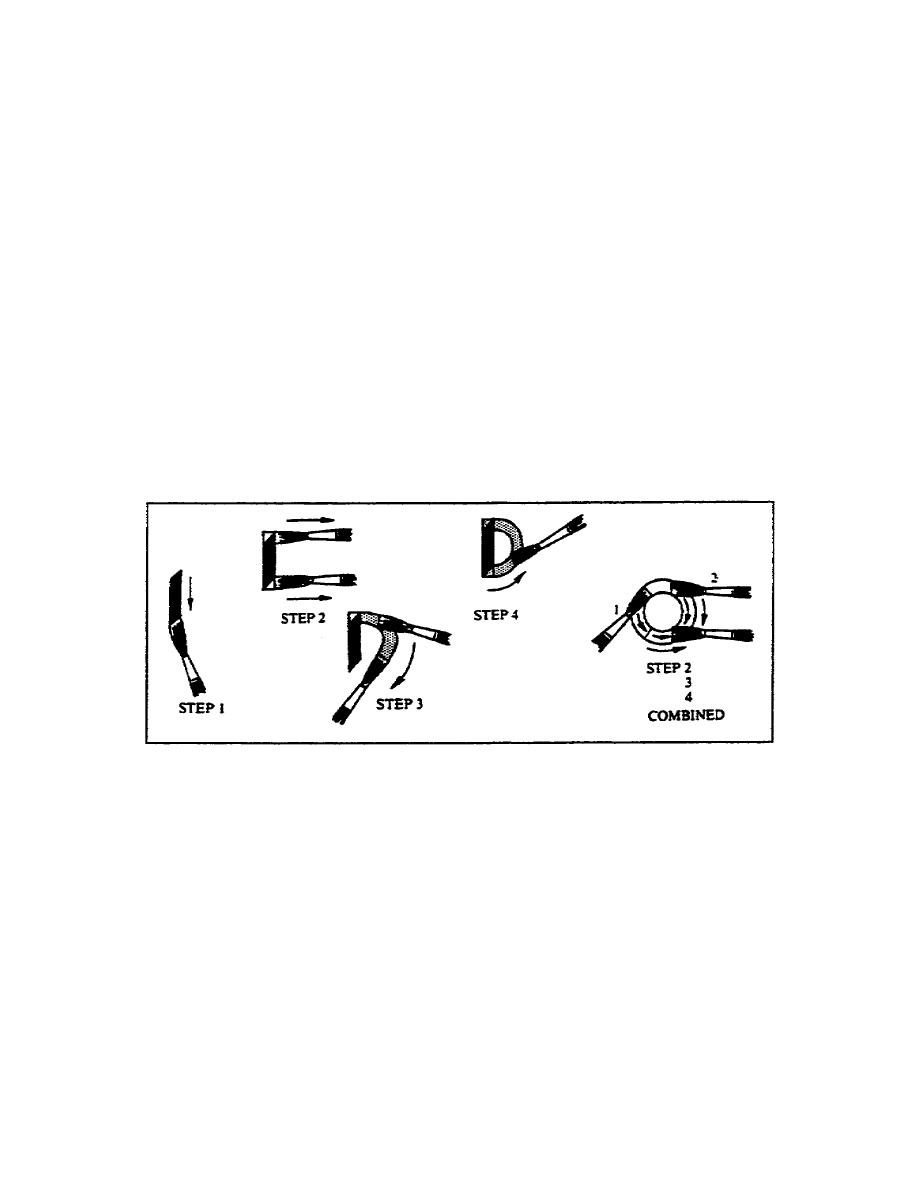
(3) Figure 212 illustrates how to make vertical and curved brush
strokes for the letters D and O.
Step 1. Make a vertical stroke.
Step 2. Turn the brush sideways and square off the top and
bottom of the vertical stroke.
Step 3. Make the left half of the curve (holding the brush
between the thumb and forefinger) twisting the brush in the
direction of the stroke.
Step 4. Connect the curve as required to finish the letter.
To draw the letter O, you start by creating two curves and then turn the
brush on its side to complete the letter.
Figure 212. Sequence of vertical and curved brush strokes
c. Learning to letter or to perform other tasks with brushes takes
significant practice. Always draw guidelines using the techniques you
learned in lesson 1. Be careful to apply the proper amount of paint.
Refer to figure 213 for examples of proper and improper paint consistency.
This concludes our discussion of brushes. As a conclusion to this lesson,
you will learn how to use one final lettering toolmarkers.
2-13
SS0525


 Previous Page
