c. Very few editors can work accurately without moving the tape reels by hand. Practice doing
this until a word recorded on the tape at normal speed can be recognized. Learn to recognize sounds
when the tape is moved at less than normal speeds. The ability to distinguish one sound from another at
low tape speed will come in time, but only after much practice.
4.
Improper edits. The angle at which the recording tape is cut is not critical as far as strength is
concerned as long as the tape is cut on a diagonal and both ends are cut at the same angle. Tape cut with
a square end invariably makes a noisy splice. It also takes more of a beating as it passes overheads and
idlers, and so it is more likely to fail. Devices with an adjustable cutting angle gives no advantage and
may mismatch the tape ends.
a. Splicing devices. As long as the tape ends are cut properly and barely touch, most splicing
devices will keep the tape from slipping to one side or falling at an angle. Some really cheap splicers
that use a pressure-formed tape channel take on an angle where the tape cutting slot is sliced through the
channel. If the joined tape ends are not absolutely flush, an accumulation of oxide flakes and other
foreign matter in the gap will make a noisy, weak splice. In editing blocks particularly, carelessness in
positioning tape ends can easily produce an overlay ready to snag on just about anything.
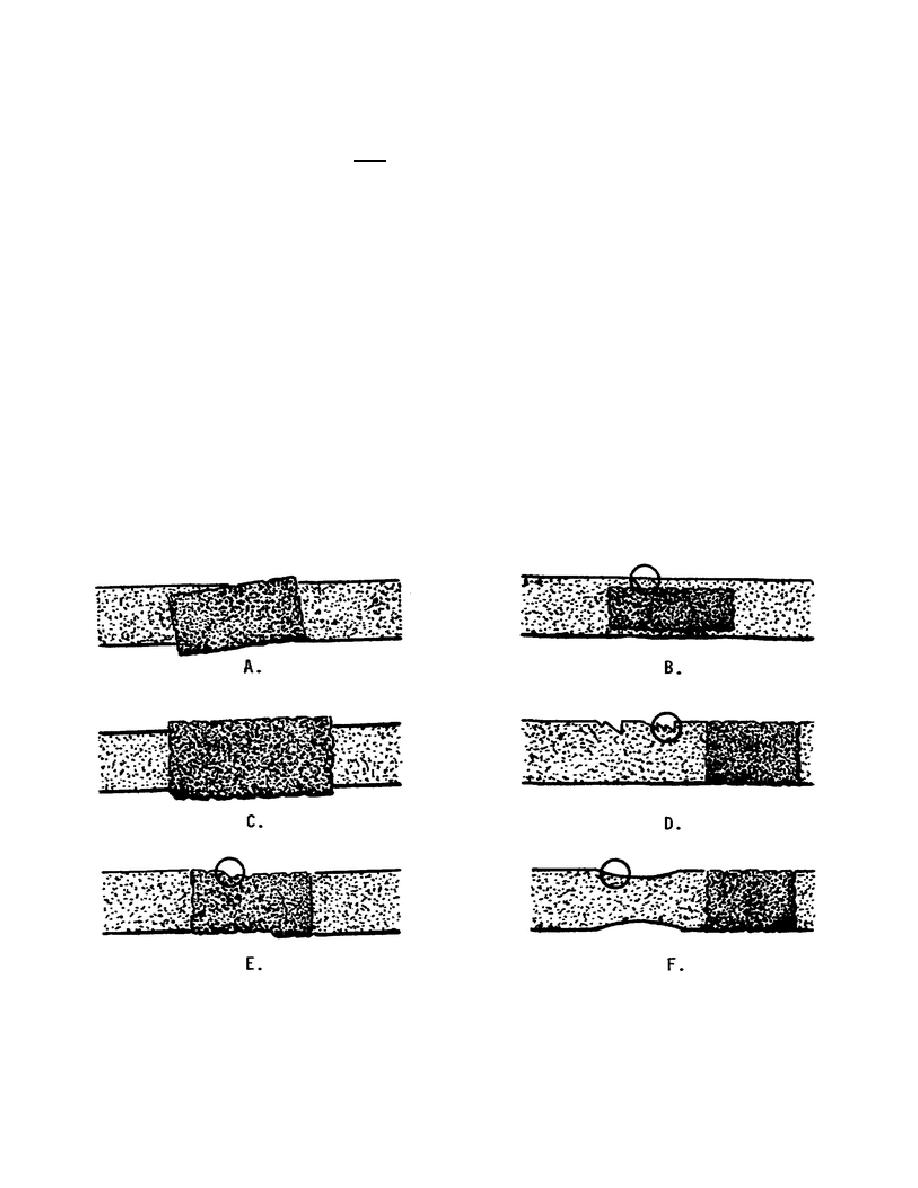
b. Ragged edges. In extreme cases, poor splicer design can even damage the tape. Ragged
edges in the channel of very cheap blocks can snag and nick the tape. With thin polyester-base tapes,
too, there is the danger that a device with too good a grip--plus a careless user--can yank the tape until it
stretches or its edges curl (fig 4-36).
Figure 4-36. Examples of how NOT to splice tape
64


 Previous Page
