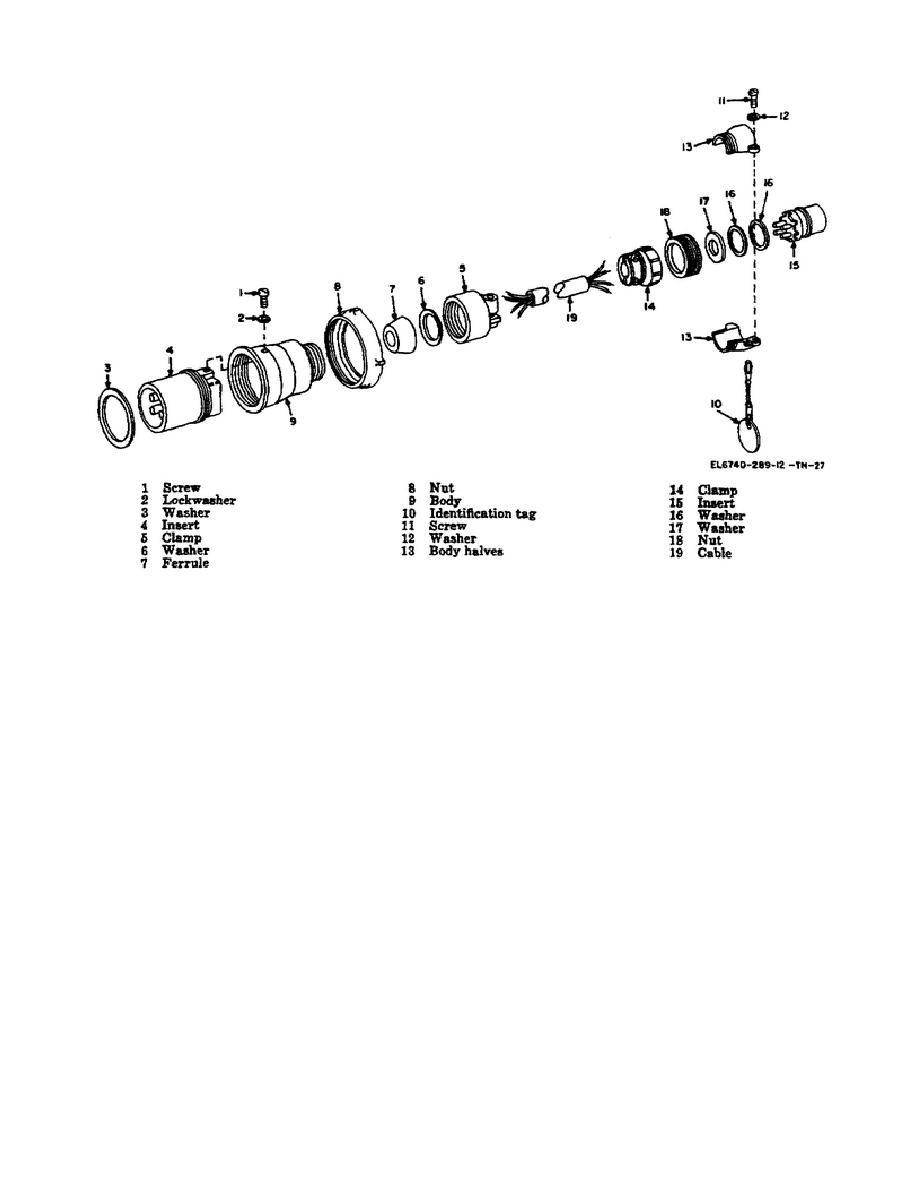
Figure 3-21. EL-5(3), EL-5(4), and EL-5(5)-F33657-67-C-0314, power cable configuration
(11) Unscrew the nut (18) from the insert (15).
(12) Slide the nut (18) and the washers (17 and 18) down the cable so that the parts do not
interfere with the next step.
(13) Tag the exposed wires on the end of the cable and disconnect the tagged wires from the insert
(15).
(14) Remove the clamp (14), the nut (18), and the washers (16 and 17) from the cable.
(15) Replace the faulty part as required and reassemble by performing steps (1) through (14) in
the reverse order.
63


 Previous Page
