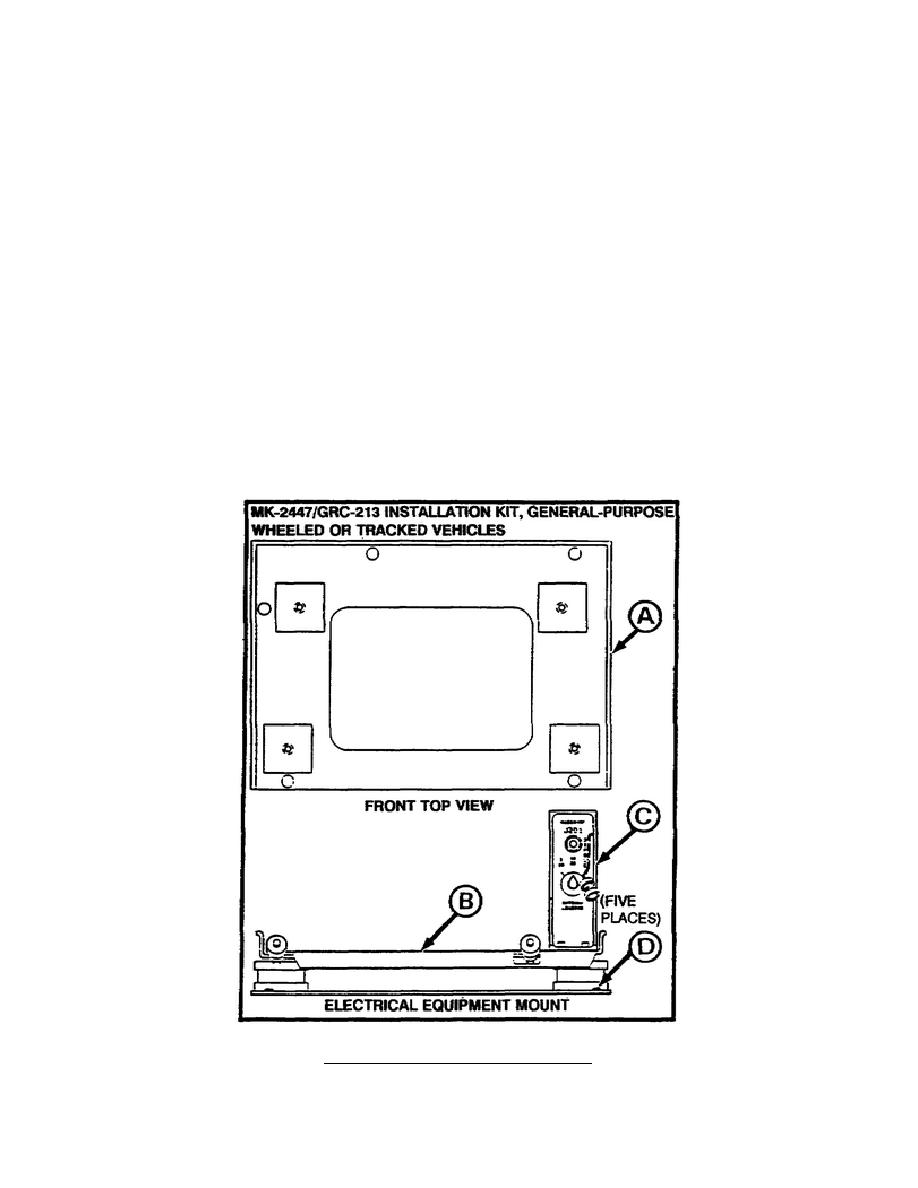
STEP 1.
Using the support bracket (A) as a template, mark six
11/32-inch-diameter holes on the vehicle sponson or shelf.
STEP 2.
Drill the six 11/32-inch-diameter holes marked in step 1.
Remove all the burrs and sharp edges from the holes.
STEP 3.
Install the support bracket (B) using six 5/16-inch x 1-
inch bolts, twelve 5/16-inch lock washers (one under the
head of each bolt and one under each of the six 5/16-inch
nuts (B)).
Use reinforcements in the side and under the
shelf as required.
STEP 4.
Install the electrical equipment mount, consisting of the
mounting base (C) and switching unit (D), at predrilled
holes on the support bracket (A) with ten 5/16-inch lock
washers, five 5/16-inch nuts, and five 5/16-inch x 1 1/8-
inch or 5/16-inch x 3/4-inch bolts (E). (Two bolt lengths
are provided from which to choose.)
b. Perform steps 1 through 3 to install the electrical equipment mount
on the vehicle floor (see Figure 3).
Figure 3.
MK-1447/GRC-213.
3


 Previous Page
