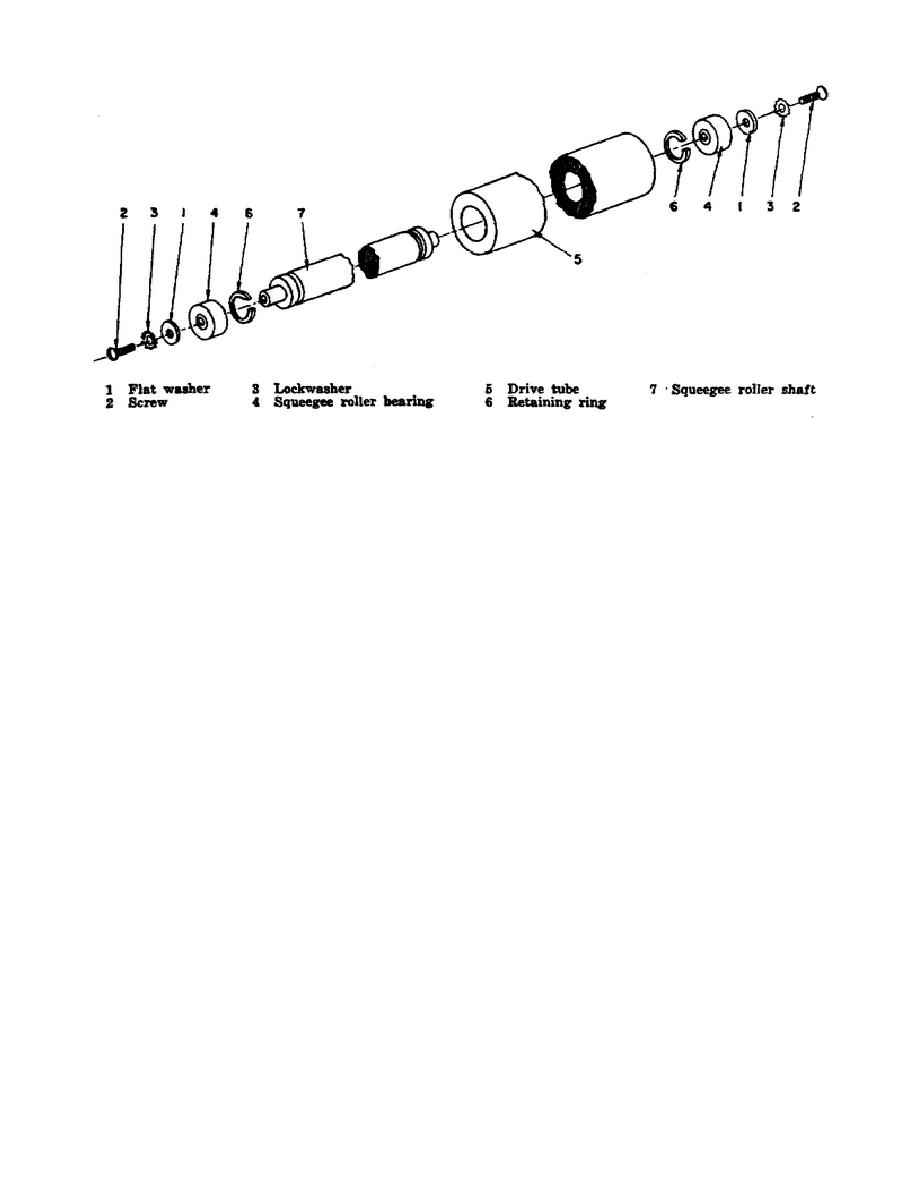
Figure 3-17. EL-5(1), squeegee roller, exploded view
(2) Disassembly. Remove the screws (2), the lockwashers (3), and the plain washers (1) to
remove the squeegee roller bearings (4). Remove the retaining rings (6) and slide the drive tube (5) from the
squeegee roller shaft (7).
(3) Reassembly. Slide a new drive tube (5) over the squeegee roller shaft (7) and secure the
retaining rings (6). Mount the squeegee roller bearings (4) to the squeegee roller shaft (7) using the plain
washers (1), lockwashers (3), and screws (2).
c. Replacement. With the squeegee lever in the MATTE PRINTS position, set the squeegee roller
firmly into the squeegee lever assemblies on the side of the drier.
CAUTION: Do not allow the ends of the squeegee roller to come in direct
contact with the apron. This could cause oil from the squeegee roller
bearings to be transferred to the apron and in turn to the drum, which would
result in staining or uneven drying of prints.
54


 Previous Page
